
Parsippany Elite Roofing has provided roof inspection in Parsippany, NJ for more than 20 years, serving surrounding cities including Hanover, East Hanover, Denville, Florham Park and West Caldwell. An inspection from us covers both sides of the roof deck: the shingles, flashing and gutters outside, and the sheathing, insulation and ventilation in the attic. That pairing is what turns a quick look into an accurate picture of how the roof is really doing.
Owners ask for inspections for different reasons. Some want to know how long an aging roof will last before they budget for replacement. Others are selling a home, buying one, or checking for damage after a storm, and need a clear written record they can share.
Whatever the reason, the result is the same kind of report. It describes what is in good shape, what needs attention soon, and what can safely wait, with photos to back up each point. We would rather tell you a roof is fine than invent work, and a sound roof gets a report that says so.
What We Check on Every Roof Inspection
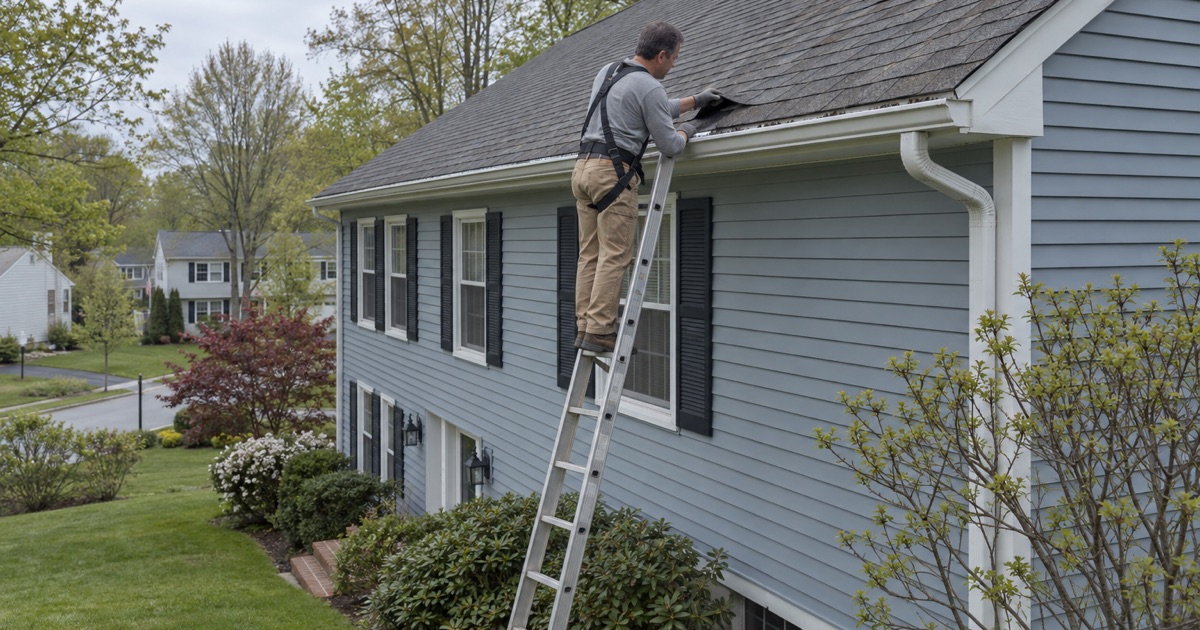
Roof Covering and Shingle Condition
We start with the material itself, whether it is architectural shingles, three-tab shingles, slate, metal or a low-slope membrane. On asphalt roofs we look for granule loss, curled or cracked tabs, lifted shingles, exposed nail heads and areas where the seal strip has let go. Each of these tells us something different about age, wind exposure and installation quality.
We also check how the roof was laid out at the edges. Missing drip edge, a poorly set starter course, or short rake overhangs often explain why shingles keep blowing off along one side. Noting those details now can prevent repeat repairs later.
Flashing, Penetrations and Roof Edges
Flashing is where most leaks begin, so we inspect it closely. Step flashing along sidewalls, counter flashing at chimneys, apron flashing at the base of walls, and kick-out flashing at the bottom of each roof-to-wall joint are checked for rust, gaps and missing pieces. Pipe boots, exhaust vents and skylight frames get the same attention.
A cracked rubber boot or a chimney flashing sealed only with caulk may still be dry today. Over a winter of freeze and thaw, though, those small gaps are where water finds its way in. We photograph each penetration so you can see its condition for yourself.
Gutters, Valleys and Drainage
A roof is only as good as its ability to move water off the house. We look at valleys for debris, worn shingles and exposed metal, and at gutters and leaders for sagging, loose hangers, clogged outlets and overflow marks on the fascia. On wooded lots across the area, leaf-packed valleys and gutters are some of the most common findings.
Poor drainage shows up in other places too. Rotted fascia boards, peeling paint at the eaves and stains on siding below a gutter seam all point to water going where it should not. We note these so they can be addressed before they cause rot.
Inside the Attic
Decking, Stains and Moisture
From the attic we can see the underside of the roof deck, which tells us more than any view from above. Dark stains around nails, soft or delaminating sheathing, and water marks on rafters show where leaks have happened in the past. Damp insulation or mold growth suggests ongoing moisture that needs a closer look.
We probe suspect areas and compare what we see inside with what we found outside. When a stain inside lines up with a flashing gap or a cracked boot above, the cause is clear. When it does not, the attic often points to condensation rather than a leak.
Ventilation and Insulation
Attic ventilation has a large effect on how long shingles last and whether ice dams form. We check for soffit intake vents, ridge vents or other exhaust, and whether insulation has blocked the soffits. Frost on nail tips in winter, rusty nails and musty air are signs that warm, moist air is trapped.
Older capes and split-levels in Morris County are particularly prone to ice dams along the eaves. A balanced intake and exhaust, paired with good insulation, keeps the roof deck closer to outdoor temperature. Our report explains whether the current setup is adequate or needs improvement.
Inspections for Specific Situations
Pre-Sale Roof Condition Reports
Sellers often want to know about the roof before a buyer’s inspector raises questions. We provide a written condition report with photos that you can share with buyers and their inspector. It describes the roof’s age, condition and any repairs we recommend, in plain language.
Having that report early lets you decide whether to repair, replace or simply disclose. It also helps avoid last-minute price negotiations based on a vague note from a general inspection. Buyers can ask for the same report on a home they are considering.
After Wind, Hail and Fallen Limbs
After a storm, damage is not always visible from the ground. Lifted shingles, torn flashing, hail bruising and punctures from branches can all go unnoticed until the next heavy rain. An inspection after the storm documents what happened while it is still fresh.
We photograph the damage and write up our findings so you can file your own claim. When you ask, we will meet the insurance adjuster on site and walk through what we found. The claim belongs to you, and our job is to make sure the evidence is clear.
Townhouses, Condominiums and Solar Roofs
In townhouse and condominium communities, roof responsibility often belongs to the association rather than the owner. Before inspecting or quoting, we check the community’s documents or confirm with the manager who holds the roof. That avoids confusion about who should pay for any repairs we find.
Roofs with solar panels need a different approach, because the panels hide much of the surface. We inspect what is accessible, check the mounting penetrations where possible, and note when panel removal would be required for a full assessment. That information is useful before any future roof work is scheduled.
Our Step-by-Step Roof Inspection Process
Step 1: Ground Walk and History
We start by walking around the house and asking about any leaks, past repairs and the roof’s age. That history tells us where to focus. We also note overhanging trees, gutter condition and any visible damage from the ground.
Step 2: Roof Surface Inspection
Where it is safe, we walk the roof and inspect every slope, valley and flashing detail by hand. Steep or fragile roofs are inspected from ladders and brackets instead. Every finding is photographed as we go.
Step 3: Attic Inspection
Next, we go into the attic to check the decking, insulation and ventilation. We compare what we see inside with what we found on the roof. That comparison is what confirms or rules out a suspected leak.
Step 4: Written Report and Recommendations
Finally, you receive a written report with labeled photos and clear recommendations. Each item is marked as urgent, soon or monitor. If repairs are needed, the scope is itemized so it can be compared with any other estimate.
- 20+ Years on Local Roofs
- Itemized Written Scopes
- Same-Day Storm Tarping